| Excerpt |
|---|
This guide covers how to configure ResourceXpress to use OAuth 2.0 to connect with Office 365. |
Pre-requisites & Limitations
If using EWS, Exchange Impersonation for all resource mailboxes is mandatory for the service account(s)
Please see the Microsoft Office 365 configuration guide for instructions to configure Impersonation
| Info |
|---|
Exchange Impersonation is not a requirement when integrating using Microsoft Graph API |
ResourceXpress Settings
To configure OAuth in ResourceXpress first sign into the admin console, using the navigation menu across the top select Administration Settings then System Settings, the OAuth options can be found under the Resource Server tab.
...
Follow the steps below in a new tab/browser window to get get the OAuth Tenant ID, Client ID and Client Secret.
Register an Azure Active Directory App
Navigate to https://portal.azure.com, from here select Azure Active Directory.
...
In the Register an application window enter a name for your application.
Select the Supported account types and click the Register button.
...
Add API Permissions
Next, select API Permissions under Manage, found on the left menu.
By default the Microsoft Graph User.Read permission is added automatically.
ResourceXpress does not require this permission, so this can be removed.
full_access_as_app
| Status | ||||
|---|---|---|---|---|
|
| Expand |
|---|
Click the Add a permission button from the API permission window. From the Select an API window choose the APIs my organization uses tab. |
...
 Select Application permissions and choose the full_access_as_app option and click Add permissions. |
...
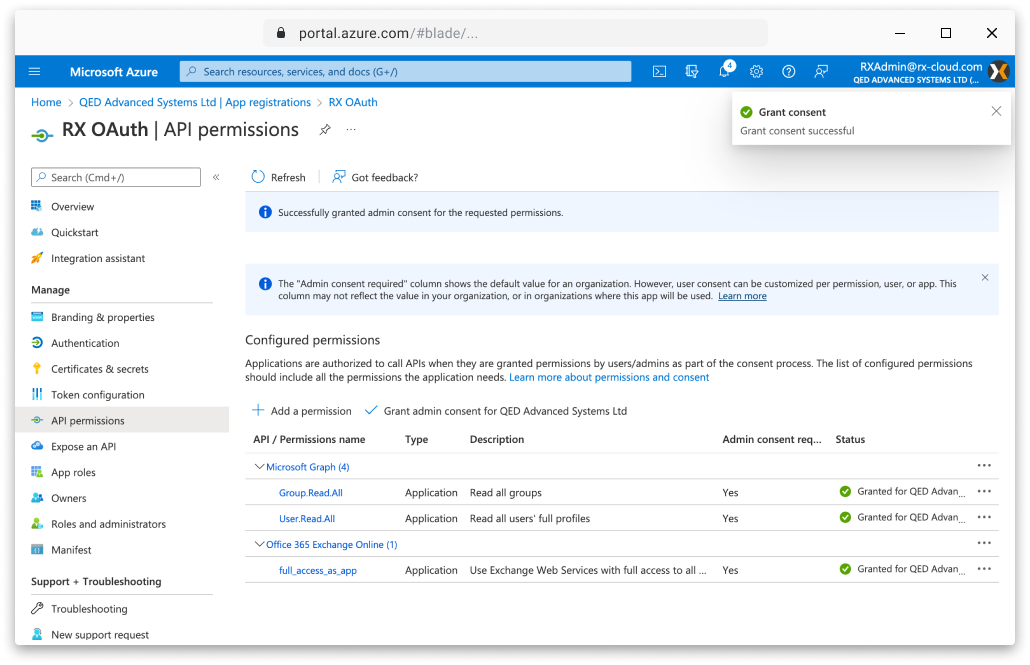
 Next, click Grant admin consent and then Accept from the confirmation |
...
dialogue box. |
...
  Make sure that admin consent has been granted to the full_access_as_app permission, this may require the page to be refreshed.  |
Mail.Send permission
| Status | ||||
|---|---|---|---|---|
|
Required to use OAuth for SMTP
| Expand |
|---|
Click the Add a permission button from the API permissions window. 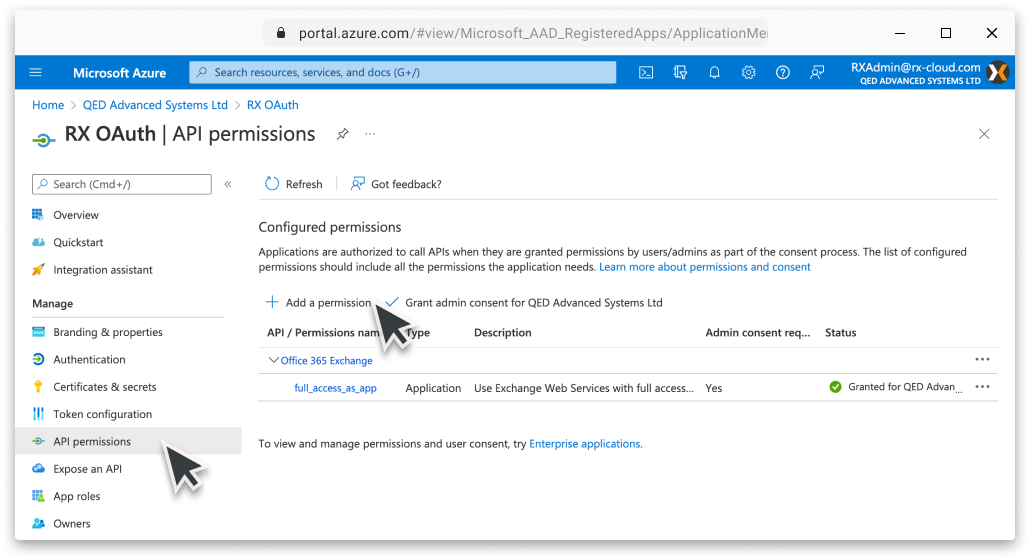 From the Select an API window choose the Microsoft Graph tab. 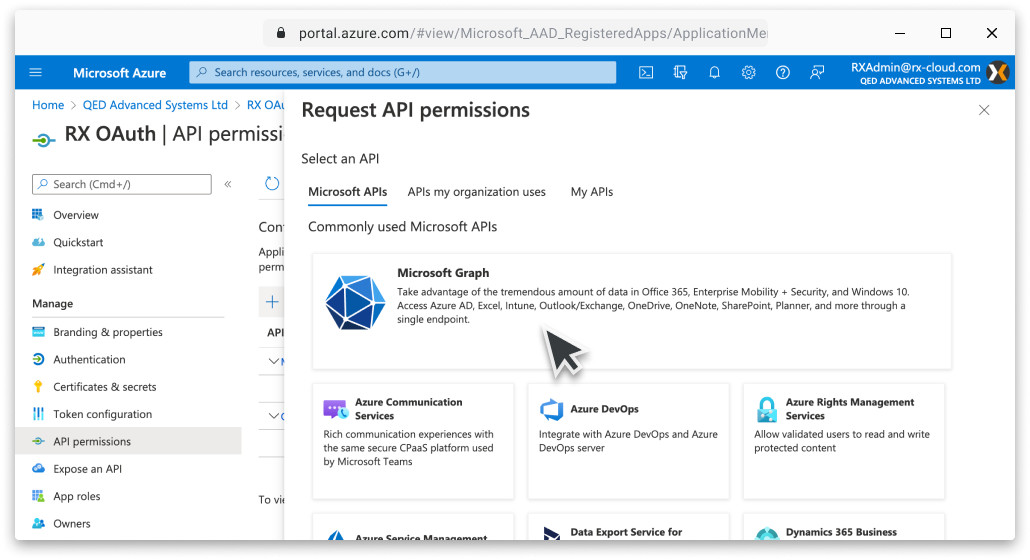 Select Application permissions and choose the Mail.Send option and click Add permissions. 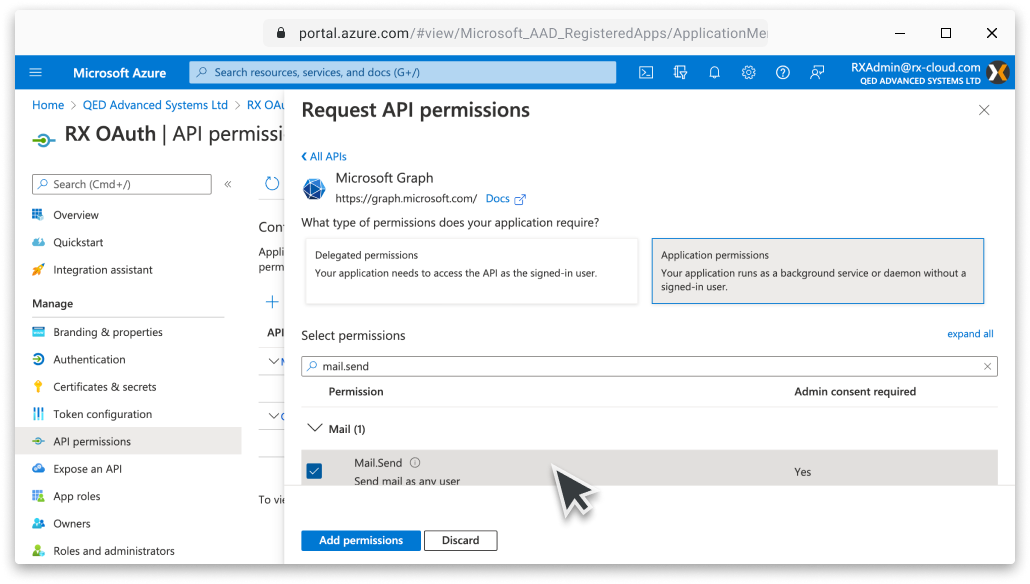 Next, click Grant admin consent and then Accept from the confirmation dialogue box. Make sure that admin consent has been granted to the Mail.Send permission, this may require the page to be refreshed. 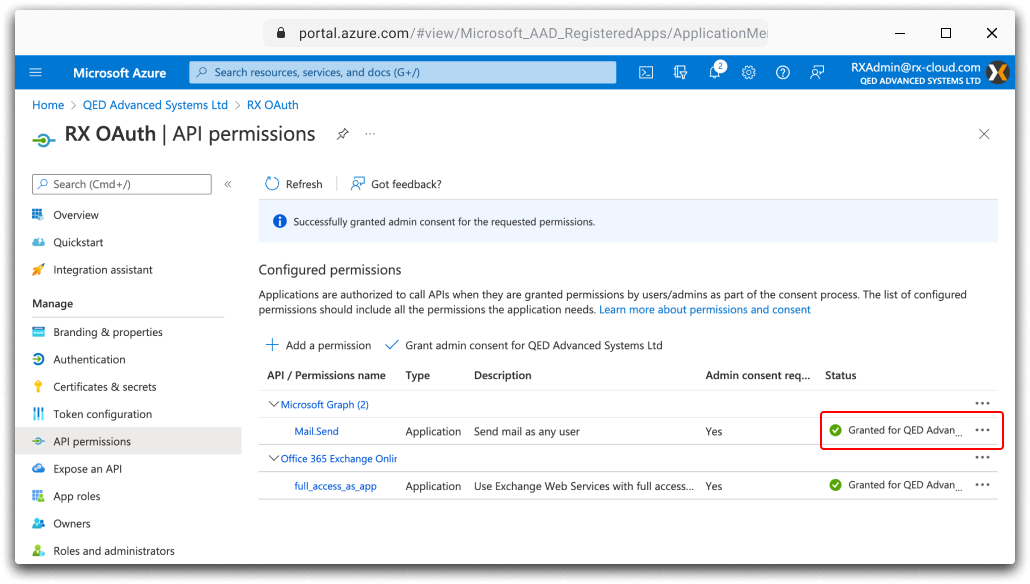 |
User.Read.All & Group.Read.All permission
| Status | ||||
|---|---|---|---|---|
|
Required to use Azure AD User Sync
User Settings
| Expand |
|---|
Click the Add a permission button from the API permissions window. From the Select an API window choose the Microsoft Graph tab. Select Application permissions and check the box for the User.Read.All and Group.Read.All options and click Add permissions. 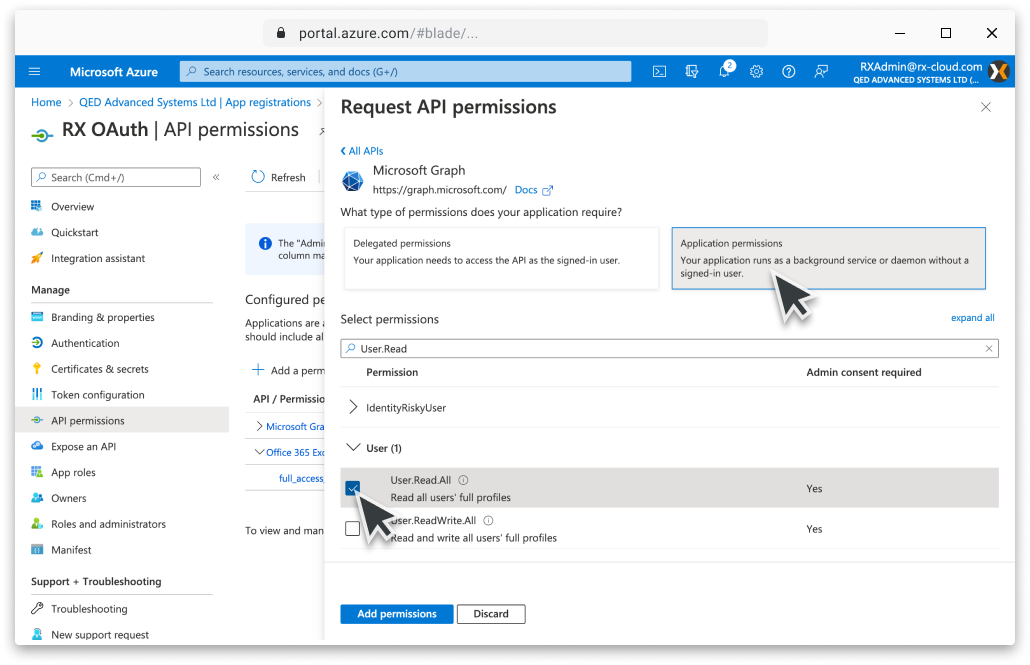 Next, click Grant admin consent and then Accept from the confirmation dialogue box. Make sure that admin consent has been granted to the permissions, this may require the page to be refreshed. |
...
 |
Generate the Client Secret
Select Certificates & secrets from the left menu found under Manage.
...
| Info |
|---|
We recommend choosing Never, as this will avoid the need to update this regularly. |
...
Click Add.
...
| Note |
|---|
This is the only time the client secret will be visible. |
Click the Copy to clipboard option for this client secret value, return the ResourceXpress Admin Console tab and paste this value into the OAuth Client Secret field.
Getting the Client & Tenant ID’s
Return to the Azure Portal, select Overview from the left menu.
...